
Desert Online General Trading LLC
Dubai, United Arab Emirates
Desert Online General Trading LLC
Dubai, United Arab Emirates


💡 Illuminate Your Ideas with SainSmart!
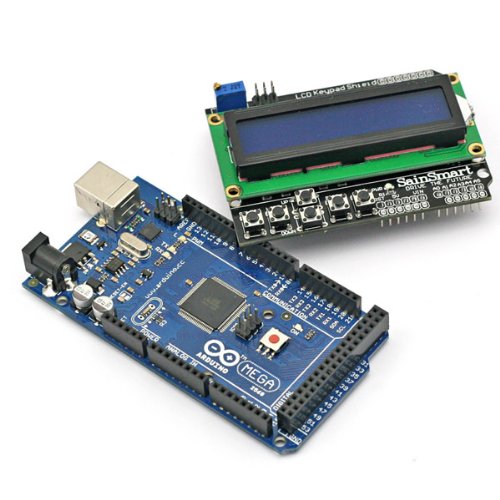
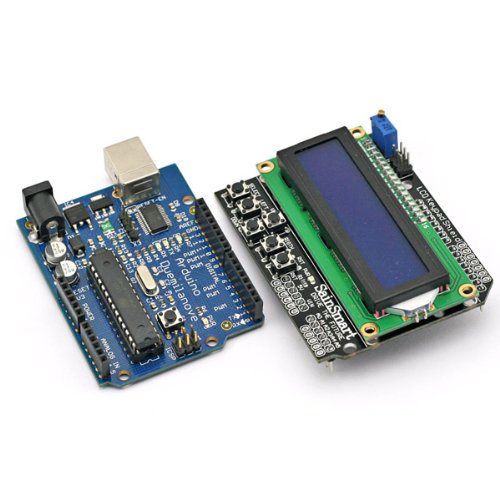
The SainSmart LCD 1602 Keypad Shield is a versatile accessory for Arduino enthusiasts, featuring a 16x2 white on blue character LCD and a 5-button keypad. It offers adjustable backlighting and is compatible with various Arduino models, making it an essential tool for custom applications and interactive projects.
J**.
Works well...Here is an example and some info
The product is good but 4 stars for not having a word of documentation and for taking up 6 digital and 1 analog IO in order to work (consider using it with an Arduino Mega if you need a lot of IOs for your project). I expected that I would find some "ready to use" sketch example somewhere to get me started but could not find much and being new to the Arduino world, (I have many years of experience in programming and PLCs) I had to dust off some old C language memories in order to make it work. So to save others some time, I put here the sketch that will get you started. You will not have to install any special libraries to get this to work.Some technical info: The screen works with the "LiquidCrystal.h" library as is (as long as you declare the right pins) but the buttons use the analog pin A0. To accomplish this, every button changes the amount of voltage on the A0 pin and you have to find what that voltage is in order to "catch" the button that is pressed. The integer values of the A0 pin range from 0 to 1023 and because in electronics almost always no 2 resistors are exactly the same, the value that you get when a button is pressed may not be the same from one screen to another. For this reason, I declared a global Boolean called "DebugMode" and when it is set to "true" the display will give you the A0 pin value when a button is pressed. Read the comments in the sketch for more info. I used an Arduino UNO R3 and the Arduino IDE version 1.6.7#include <LiquidCrystal.h>LiquidCrystal lcd(8, 9, 4, 5, 6, 7);int LastKeyPressed=-1;bool DebugMode=true;void setup() { lcd.begin(16,2); lcd.clear(); analogWrite(10,30); if (DebugMode){ DisplayText(0,0,"A0 Value"); }else{ DisplayText(0,0,"Last key pressed"); }}void loop() { char *DisplayString=""; int A0Value; A0Value = analogRead(0); // The keys pass a unique value to A0 if (A0Value!=LastKeyPressed && A0Value<1020){ DisplayString=""; if (A0Value>0 && A0Value<10){DisplayString="Right";} if (A0Value>135 && A0Value<150){DisplayString="Up";} if (A0Value>310 && A0Value<360){DisplayString="Down";} if (A0Value>490 && A0Value<520){DisplayString="Left";} if (A0Value>730 && A0Value<750){DisplayString="Select";} } if(DisplayString!=""){ LastKeyPressed=A0Value; ClearLine(1); DisplayText(1,0,DisplayString); } /* Set the DebugMode variable to true (at the top) to get the A0Value * that corresponds to the keys of your display. Then make sure that the * correct key numbers are in the range of the "if" statements above and * they correspond to the right text. Note that the first "if" statement * checks if the A0Value is smaller than 1020 because when no key is * pressed, the A0Value is (ideally) at 1024 (5V)*/ if (DebugMode){ sprintf(DisplayString, "%d", A0Value); ClearLine(1); DisplayText(1,0,DisplayString); delay(250); }}void ClearLine(int LineToClear){ lcd.setCursor(0, LineToClear); //0 is the first and 1 is the second line, x=0 lcd.print(" "); //Add 16 spaces to clear the line (there may be better ways to do this)}void DisplayText(int Line, int CursorPos, char *TextToDisplay){ lcd.setCursor(CursorPos, Line); //0 is the first line and 1 is the second line lcd.print(TextToDisplay);}
E**H
Be ready for hours of research for Netduino
The item was delivered in 24 hours, what great Prime service.Hardware-wise, this board seems really slick.Just a quick note/catch for Netduino users.There seems to be a lot of code to be found that works with Arduino. If you are a NEW Netduino user, you will not plug and play, you will have to spend a lot more time converting an Arduino lib to C# (should be simple). After searching for 2 hours, I have not seen any sort of C# lib that works for this LCD on Netduino (but one may be found with more digging). As far as I can tell, for Netduino, you will not be up and running quickly - experienced Netduino users may have better results.Considering how popular this LCD board is (found everywhere), it would be really nice to see a Netduino class that wraps up the usage of this device - that is kind of the point of .NET here. If the vendor gave a link, that would be great!I will post a link if I do find one or if I have to make a class myself.I guess Netduino is still in its infancy so one can't expect too much at this point. On the contrary, I/O is kind of important early on, so helping new users with this specific task would be a nice thing for a product offered via Amazon Prime.Good luckUpdate:I up'd this from 3 to 4 stars, here is why.I did get this to work within 5 minutes, with Arduino and the standard LiquidCrystal lib. Netduino was a bit rougher. I got it to work with this lib:Toolbox.NETMF.Hardware.Hd44780Lcdwith the following constructor: Hd44780Lcd Display = new Hd44780Lcd( Data4: Pins.GPIO_PIN_D4, Data5: Pins.GPIO_PIN_D5, Data6: Pins.GPIO_PIN_D6, Data7: Pins.GPIO_PIN_D7, ClockEnablePin: Pins.GPIO_PIN_D9, RegisterSelectPin: Pins.GPIO_PIN_D8 );It seems that with a lot of these boards, half or more of the battle is documentation and communication. Many will say, oh, all the docs are there. That is true, but the docs (at SainSmart and others) are often so very disorganized. Newbies (like me) will experience pain but experienced OpenSource users know how to cut through all the garbage.The buttons on this board will probably work fine, but it is known that the last 2 of the buttons will give the same > 1024 analog reading (search and you will find). The reason is that the the buttons are connected (with different resistors) to a 5v analog output line, instead of 3.3v (Arduino). You have to deal with that (2 buttons give the same voltage) or replace a resistor or two. The other option is to route the analog line through a board meant to change the signal from 5v to 3.3v, then your analog button readings will all be under 1024 - while kind of defeats the intent of the built-in buttons.I hope this helped some of you.Good luck
A**R
No instructions, web links, or reference materials
Ok, I bought this so I wouldn't have to deal with jumpers and pin layouts. Unfortunately when I received this item it didn't come with one word on how I should use it. So having some skills I went to Google. Well there aren't a lot of references on google (aside from the 100s of links to buy this board).No problem, since the board is from SainSmart I went to their website. Wow, they have an LCD module listed, but nothing on theire site. So I am questioning, is this product discontinued?Ok, back to Google. Found a link to a modified LCD library at [...] Great, just download the library, update some includes and I should be running. Well, I m getting various problems with "undefined" constants in the build process (I am using a Uno and Eclipse development environment) so I am in the middle of figuring out what is wrong with the build environment.Very disappointed in SainSmart and the product. I don't know SainSmart as this is my first experience with them, but my initial reaction is to buy Arduino shields elsewhere!A day later I figured out that the best way to drive this LCD is using the LiquidCrystal library that comes with the Arduino (The modified LCD library LCD4Bit_mod is outdated). The pin assignments in the constructor of LiquidCrystal need to be updated to match the layout of this board. For my Uno I used "LiquidCrystal lcd(8, 9, 4, 5, 6, 7);".Ok, days have passed by since I originally posted this review. SainSmart contacted me and refunded my money (I didn't request this and I did get the part working). They are working to address the problems (providing documentation and resources for customers) so I'm changing my rating to 3 stars (formerly 1). Their actions are honorable and hopefully, any future dealings I have with them will be "smoother"!
D**E
Super easy to hookup and get going with some example apps, works well and a bargain at this price.
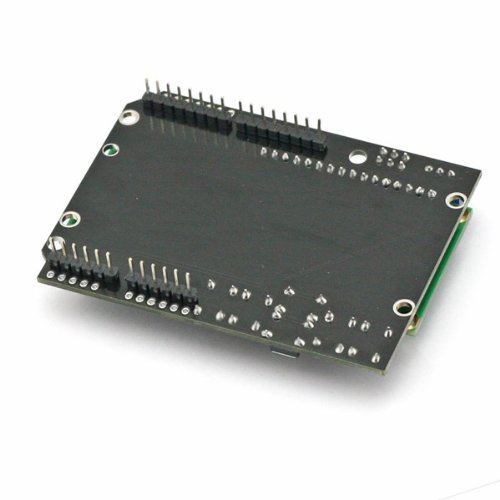
I thought that hooking this up might be a challenge but it was super easy. I mounted it to an Arduino Mega 2560 board, loaded up some Basic Example apps and had the display working in no time. My main objective for this display with the 6 keys was to implement a menu system...of which there are some good examples of on YouTube.I modified one sketch to add a couple of more menu items to get a feel for how the sketch is supposed to work. Perfect!This screen has some holes for soldering on extra headers if you need them for other parts of your project, but with the Mega 2560 there are ample pins still available so I haven't bothered. I will likely solder on some headers when I get my next screen and mount it on a UNO R3.I will likely buy a couple of more of these screens for other projects in the future.
P**R
well made
LCD shield, well made.works as expected.
G**D
Five Stars
Great product, buy again
P**E
Three Stars
Works well.
M**.
thumbs up!
Works great! Plug and play! Just have to find the correct library's from sain smarts website. Super easy to use. Shipping was fast!
Trustpilot
5 days ago
2 months ago