

🍞 Rise to the occasion with fresh bread on your schedule!
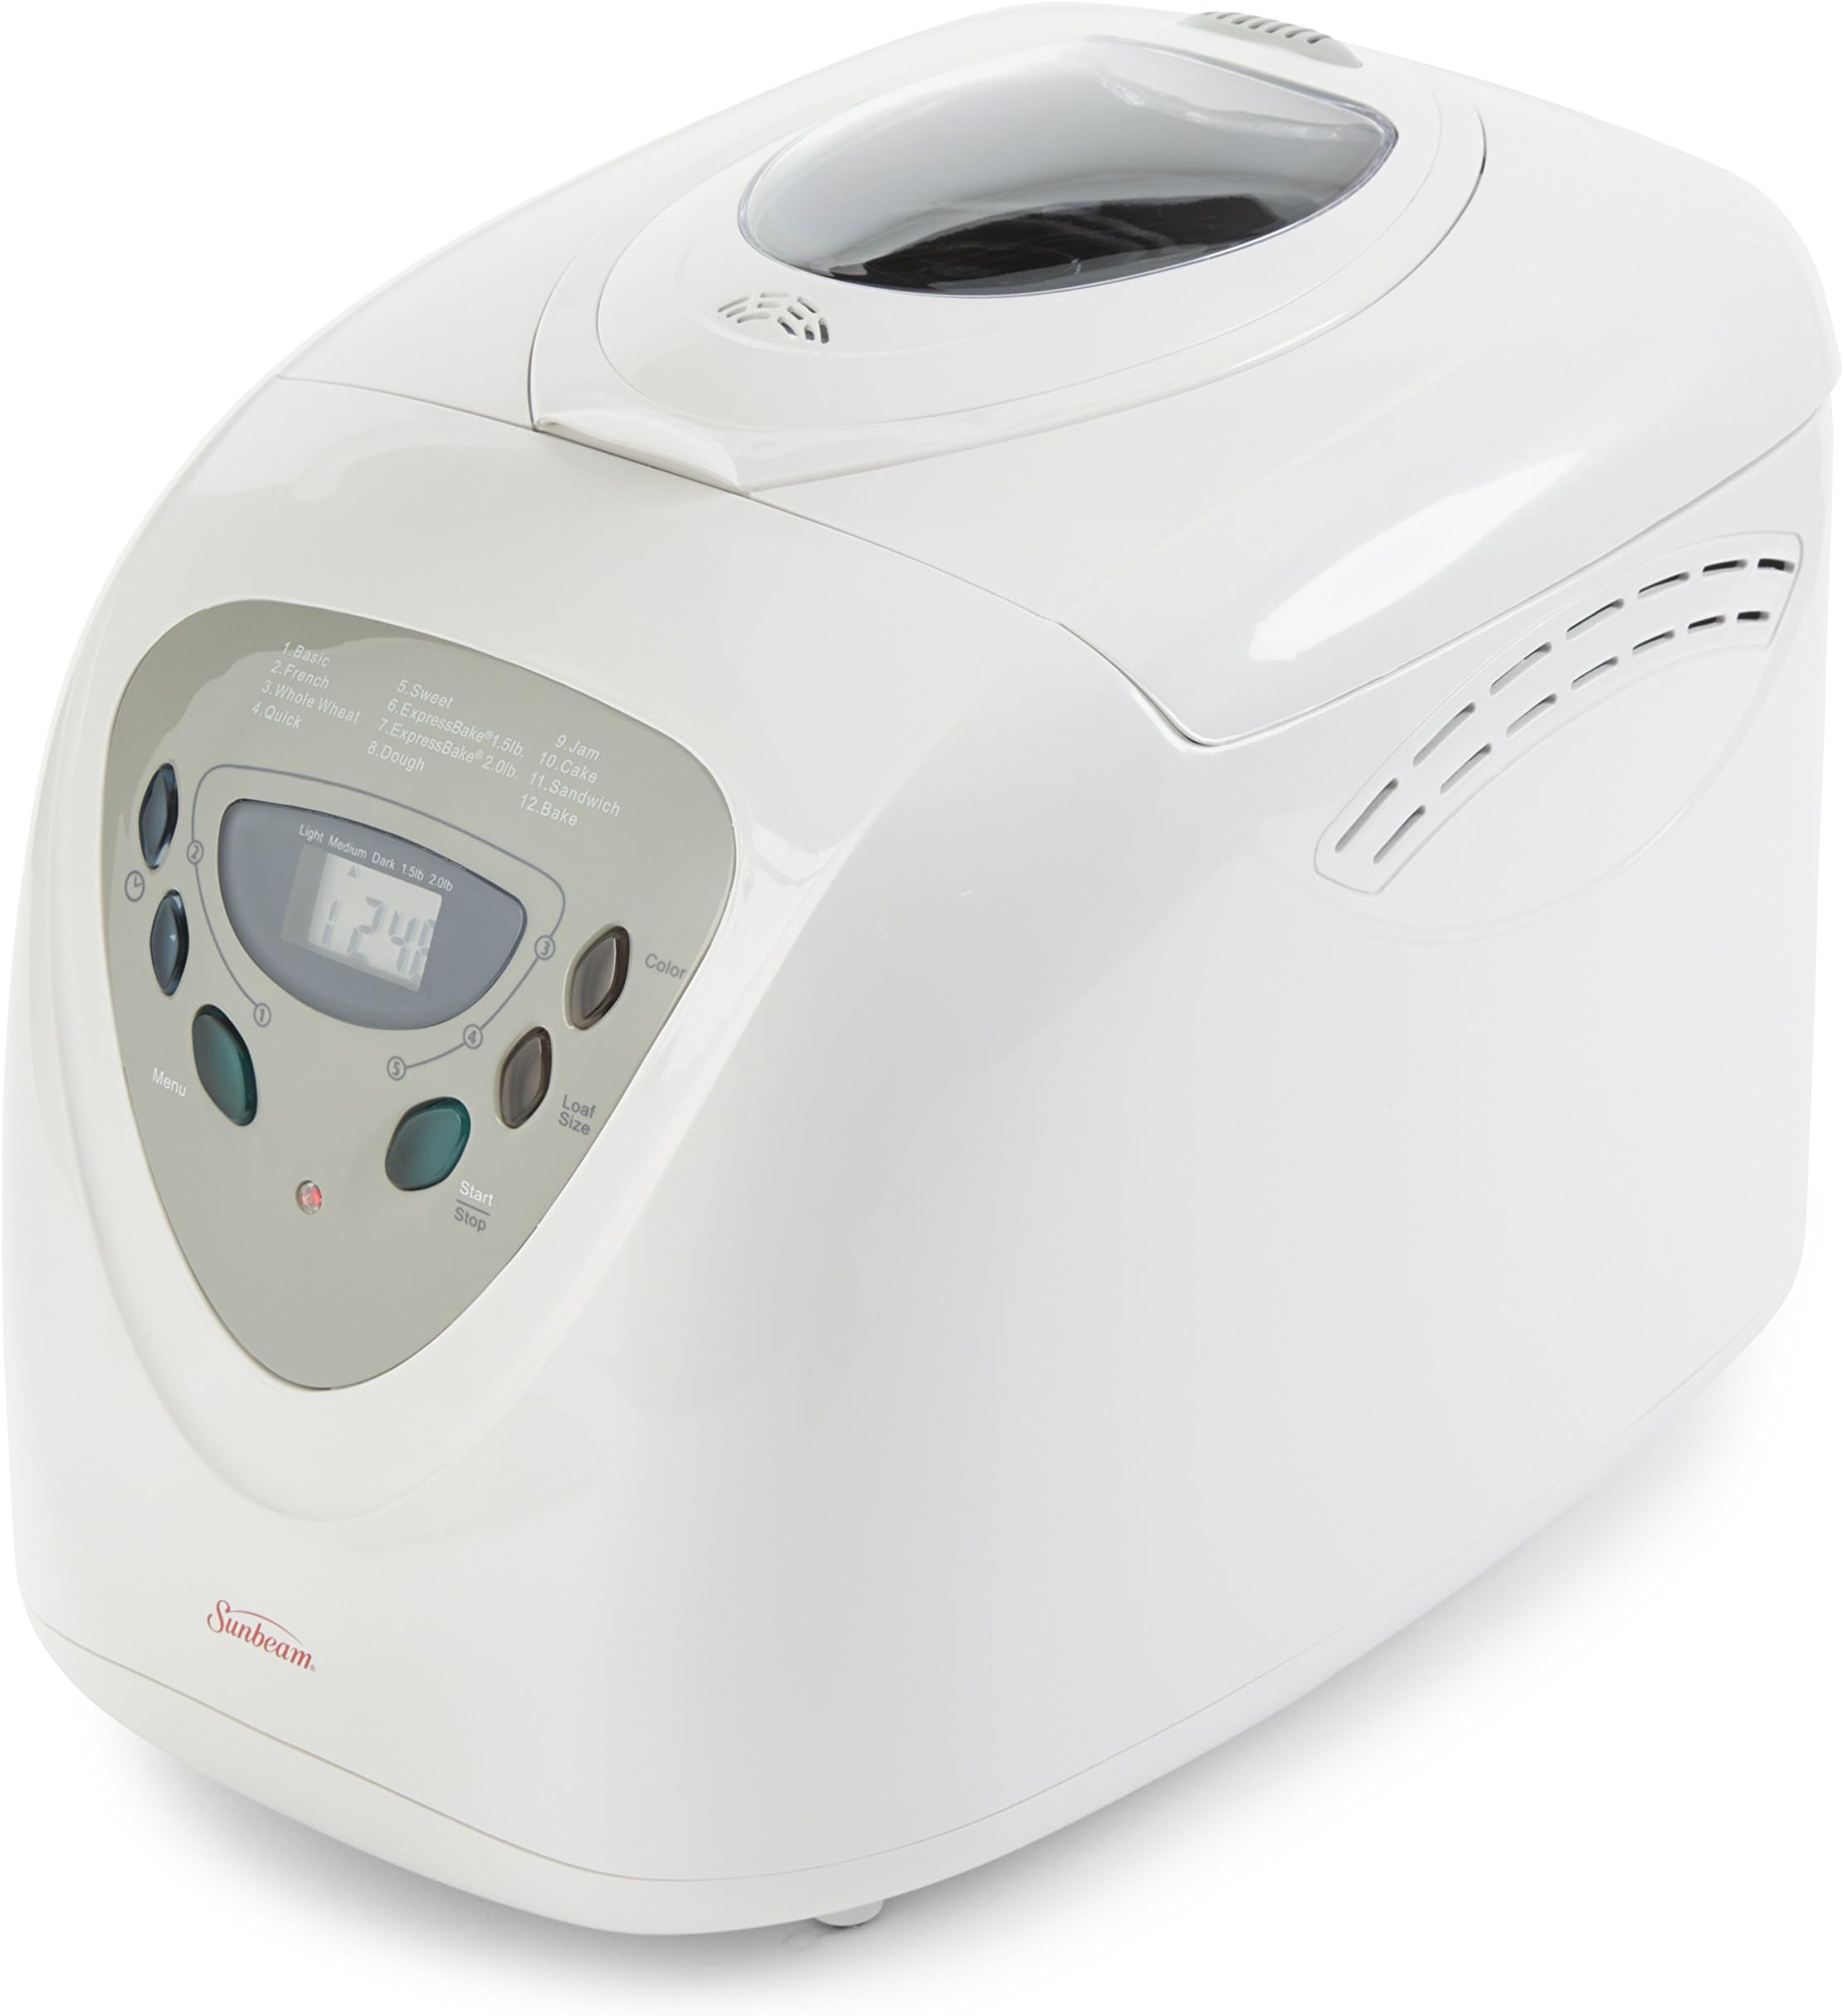
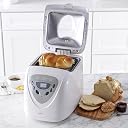
The Sunbeam Programmable Bread Maker is a versatile kitchen essential designed for busy professionals who crave fresh, homemade bread without the fuss. With a 2 lb loaf capacity, 12 baking functions including gluten-free and express options, and a programmable 13-hour delay timer, it offers unmatched convenience and customization. Its user-friendly LED control panel and non-stick removable pan simplify operation and cleanup, making artisan-quality bread accessible even to novices.


| ASIN | B00067REBU |
| Best Sellers Rank | #873,249 in Kitchen & Dining ( See Top 100 in Kitchen & Dining ) #268 in Bread Machines |
| Brand | Sunbeam |
| Brand Name | Sunbeam |
| Capacity | 2 pounds |
| Color | White |
| Customer Reviews | 4.4 out of 5 stars 3,129 Reviews |
| Global Trade Identification Number | 00027045652933, 20027045651787 |
| Included Components | 1-Year Limited Warranty, Kneading Blade, Programmable Bread Maker, Removable Nonstick Baking Pan, User Manual With Recipes |
| Item Weight | 16.9 pounds |
| Manufacturer | Sunbeam |
| Material | Information Not Available |
| Model Number | 005891-000-000 |
| Number of Programs | 12 |
| Part Number | 005891-000-000 |
| Product Care Instructions | Wipe with Dry Cloth |
| UPC | 787543785549 087045651787 027045652933 887663159418 999993367828 882371227381 797267853158 667562989244 027045651783 617999491421 791769560989 082338042600 789185776770 |
| Unit Count | 1 Count |
| Wattage | 600 watts |
M**A
Perfect for complete novice
First I must admit I am a complete novice. I had never even baked cookies in my life. However, I wanted to eat some fresh bread, and healthier bread (I don't like that store breads have like 20+ ingredients) So I researched for a relatively inexpensive breadmaker to try it out. I have only used it 5 times, but wow, I am thoroughly impressed. I was a little overwhelmed with the comments of users and my research that said how important it was to have exact measurements, some people claiming to use a scale instead of measuring cups to get exact numbers, and how a little more or less: sugar, salt, yeast could cause terrible consequences, etc, etc. I am not here to judge bread experts, since I am a complete novice, but in my 5 loaf experience, I have found the statements above to be false. By mistake I added 1/4 of a teaspoon more to a recipe (active dry yeast and instant yeast have a 1.25 conversion rate according to most sites) and the bread came out just fine. On another bread I added a about 1/3 of a cup more liquid (pineapple juice for a very good pineapple bread) and it came out just fine. Oh, I also tried a glutten free bread for a recipe that wasn't for a breadmaker, and the bread came out fine still. Sure it wasn't a perfect rectangle/square, it looked rustic and was as fluffy as any glutten-free bread I've ever tried. In general, I love the ease of use, and don't let bread experts scare you away with those pesky exact measurements. Just try to keep it within what the recipes call for, but you don't have to use any fancy scales or worry about an extra gram of salt falling in the pan. The machine talks about a precise order of ingredients - this too does not matter at all if you're making the bread right away. Feel free to put the yeast first with the liquid, in fact you can let it "activate" even if its instant if you want, then add the flour, or add the flour first and then the liquid - again none of this matters at all. However, it could be a good practice to do the liquid->dry->yeast order for when you want to use the time delay feature - its only important then. Also, did I mention this product is super easy to clean? The convenience is simply great. The only negative thing I can say about this machine is that the LCD is of very poor quality, and you can barely read it under a bright kitchen light. A few more notes: - Using a kill-a-watt to test it, the machine uses between 3 and 6 cents of electricity in the "basic setting" in almost 3 hours, depending on peak hours and settings. So - Whole Wheat bread flour is awesome - makes incredibly fluffy bread! (Even my local supermarket carried it - WINCO for those in the northwest) So what did a complete novice bake successfully? - The super cheap but good white bread. (costs about $0.38 cents to make a 1.5lb loaf, including electricity. Even cheaper if you used all purpose flour, but I have liked my results with bread flour so I'll be sticking with it - specially the whole wheat one). White bread flour, water, a little salt, yeast. Used the basic setting, and medium crust color. - Pineapple bread (I decided to add half a cup of pineapple in addition to what the recipe specified, and it turn out just fine). Whole wheat bread flour, sugar, pineapple juice, butter, 1 egg, yeast. This one was about 1.10 or so to make (most of the cost from the pineapple for the juice and fruit, fruit is expensive :/. But you can easily make this with just pineapple juice and that would take the cost down to like 75 cents per 1.5lb loaf. - Glutten free bread (glutten free bread mixture, soy milk, salt, sugar, yeast, 1/2 cup of eggs (2 full eggs, 2 egg whites) - (update) Banana bread (it was gone in less than 24 hours, and it was made with brown sugar and whole wheat bread flour on the "cake" setting on the machine) - (update) Whole wheat honey bread - really good and filling. All 5 turned out really good. I cannot say enough good things about the whole wheat bread flour. You can easily substitute it 1:1 in any recipe that calls for flour/white bread flour/all purpose flour. Well, I cannot say that with certainty, but I did substitute it 1:1 after doing some research and the result was just fine in all 3 loaves I tried that on. Conclusion: even a novice can make great fresh bread. Note: I will update this as I make more loafs. But so far, despite the poor LCD, this is a great investment of $50 dollars. (as of February 2012) Updated on 2/20/12 with more recipes.
R**3
Great breadmaker, even for 1 lb loafs
I read some online reviews about this breadmaker being a best value an have to agree it is. I got this from Amazon for less that $45 about a month ago and it was an extraordinary deal. It does just about everything more expensive breadmakers do, and makes excellent bread. It has settings for most every option, but only 1.5 and 2 lb size loafs. However, I regularly use the 1.5 lb size on the light crust setting to bake 1 lb loafs without any problems. Any 1.5 lb recipe can be modified to 1 lb simply by using 2/3 the ingredients (there are conversion tables on the internet for tbsp to tsp, etc.). I had looked at some expensive 1 lb bread machines and saw reviews complaining that there weren't many 1 lb recipes available (I guess these people didn't realize there aren't special ingredients for 1 lb loafs and you just convert 1.5 or 2 lb recipes). My favorite so far is the King Arthur Flour bread machine white bread recipe. I did a bit of internet research on this model and it appears that it is sold in a number of other countries under different names. Two I saw mentioned were Brazil and the UK. It is probably made by some Chinese company and Sunbeam simply buys and re-brands it for sale in the US. This machine is not perfect though and is a lower end model, but these issues are minor considering it is such a low price. The instructions are rather sparse, leaving out some key facts. One is the beeping that occurs about 20 minutes into the cycle signals when to add fruit and nuts to the dough, if you want. Another is explaining what the wire hook included is for, which is to remove the paddle from the loaf if it happens to get stuck in there. The third issue is that there are very few recipes that come with the machine, but getting a book of recipes is not why you are buying a low cost bread maker. You don't buy other kitchen appliances for the recipes, and bread is not a unique food. You can make any bread recipe in the machine, and the best thing to do is search the internet for some. There are loads of them out there for free, most tailored for 1.5 or 2 lb loaf machines, as well as some books you can buy. My last issue is that the bread pan is rather thin, thinner than the top of the line breadmakers. This causes the bread to get a thicker crust when baking. If thicker crust is an issue for you, you may want to look at the high priced breadmakers which have thicker pans, since lower priced models seem to have the thin style. Also, take the bread out of the machine as soon as it is done baking, leaving it in longer will make the crust harder. A helpful tip I read elsewhere is to put some cooking oil on the post you place the paddle on in the pan. This keeps the paddle from getting stuck to the pan. However, if it does get stuck, simply put enough water in the pan to cover the paddle, soak for 15 minutes, and then hold the gear underneath the pan firm and you should be able to pull the paddle off. Holding the gear under the pan while pulling makes removing a stuck paddle much easier. I don't know how long the Sunbeam will last, but overall an excellent value for the price.
S**A
Very decent quality, works well, good capacity for counter space
This is a bread machine. That's not high praise, but it is indeed praise as many similar items I've used in the past could be called so many worse things ranging from 'tiny broken washing machine' to 'garbage' all the way up to 'expensive garbage.' This, however, is exactly what it claims to be and works as well as you'd expect. It does what it says on the tin. It is of mid-range capacity and if left to its own devices (i.e. you put ingredients in the pan and press the White Bread button) it makes perfectly acceptable sandwich bread (In a sort of crazy rectangular block with a stirrer-sized shape missing from the 'bottom' of the loaf) But no one should be using these machines in this fashion. Instead, bread machines should primarily be used as a dough-kneader so that you can concentrate on whatever else you're doing for prep and when the machine is done you let the dough rise / settle / punch down, whatever it is the recipe calls for after kneading. As a side benefit, you can set them on a timer to make you fresh bread when you wake up (that sort of thing) or use the built-in oven to mix jams (something these are also fairly good at.) So I'll review it in that vein, as a dough-kneader. This is a GREAT dough-kneader and I've used it to make delicate breads like French Loaf, Baguettes and even croissants with excellent results but I've also used it to mix up Pumpernickel and other hearty wheat breads (some so thick I hear the motor straining a little) and the machine has trucked through them without issue. But another result of this power is that the stirring mechanism no longer fits tightly to the post on which it rests at the base of the mixing basin. It has not deformed, overall, however and still kneads the bread fine. It has not slipped or stripped - it just removes easily. The stirring mechanism and the entirety of the inside mixing basin is coated in Teflon so cleanup is exceptionally easy. Do not soak the entire basin in water as the mechanism traveling through the base of the basin has been greased by the factory and sealed. Simply fill with water from the top, agitate, pour out, wipe down with a dish mop / paper towel. Easy. It is an odd shape though its overall footprint is not demanding on your countertop. It's unwieldy, rather than large. Be creative and find a place where its odd shape fits. Move other rectangular objects (which can stack together easily) elsewhere so this can have that one odd corner into which it will stay nicely out of the way. You can store it away, of course, if you don't make bread all the time as I do but you'll find it takes up the same odd space in a cabinet so good luck with that. Bread makers are a dime-a-dozen in the availability of various styles and brands but they are not literally 12 for 10 cents in actual cost so it's very possible to waste time and money by buying the wrong one. Know then that this one is a simply solid performer which is worth the amount on the tag, as so few things are.
F**T
Great Machine, Great Price
Not having owned a bread machine before, I did my online research and decided to try a reasonably priced "good-enough tester" machine... Well, I'm VERY glad that I decided to purchase this "more-than-good-enough" model! This particular model is reasonably quiet while in operation, beeps after the 1st rest to indicate that it's time to add the nuts/raisins, etc., and beeps after the baking cycle is completed (if the bread is not removed from the machine as soon as it's done, it might lose moisture during the auto keep-warm cycle). I've twice made the following recipe with pine nuts and twice made pistachio-raisin bread (from "the Big Book of Bread Machine Recipes")--delicious. The best part about this machine baking process is that it's not at all difficult in any way. Here is the typical baking process: Warm the liquid in a glass measuring cup in a microwave, stir in the salt/honey/sugar/butter in the warm liquid, pour the mixture into the baking pan, place the pan on the scale, adjust the scale to zero, add the required flour (1 cup flour = 4 to 4.5 oz), level the flour, add the yeast, twist to lock the pan into the breadmaker, plug in the breadmaker, select the crust color (best to try the "Light" color first), select the baking setting, after about 5 min. check the dough and add water/flour if necessary (very important step), remove the bread to a cooling rack as soon as it's done, then wipe the baking pan when it's cool enough. (It's helpful to have a portable timer on you to remind you to remove the bread, wherever you might be.) The clean up is SO MINIMAL that the bread tastes just that much better! And, whenever we want oven-baked loaves, I'd simply use the breadmaker's dough cycle to lessen the clean up and do the rest as usual. However, there are some negative aspects related to this bread machine: 1. The user manual is very uninformative for a new user, so don't even bother. Instead, buy "The BIG Book of Bread Machine Recipes" by Donna Rathmell German (on Amazon; 600 recipes from 5 of her bread machine cookbooks) or other bread machine cookbooks and rest assured that the resulting loaves will be enjoyable and varied. 2. On my machine, I had to make sure to select the "light" color, else the loaf gets too brown/too thick crusted. 3. So far, all 4 loaves have slightly caved/sunken/deflated as soon as the baking cycle kicked in. Although the loaves are just slightly sunken, and the appearance and taste were not affected in any way, I will try using less liquid than normal (for a firmer dough) or less yeast (to slow the dough expansion process for this machine) to prevent the sunken look next time. Useful tips for new bread machine user: 1. Get a dependable scale, instant-read thermometer, and a liquid measuring cup--approximations might not work well when you're new at using bread machines. 2. For the basic cycle, if baking the bread right away, you can just place all the ingredients right into the baking pan regardless of the liquid-first order stated on the manual. 3. If adding additional flour/liquid to the baking pan, add carefully. Any spilled gunk on the bread machine's bottom or heating element might take some scrubbing if baked in. 4. If additional kneading time is desired, just stop and restart the machine for additional gluten development/knead time. 5. For the initial confidence-building 2-pound loaf, try this tested recipe (might have to set your Sunbeam to "Light" color): 1 1/3 cups milk and/or water, 2 tb honey/sugar, 1 1/2 teaspoons salt, 2 tablespoons butter, 4 cups bread flour (I used Gold Medal unbleached all-purpose), 1 1/2 teaspoons active yeast, 1/4 - 1/3 cup of pine nuts/other chopped nuts (optional). Remember to check the dough consistency after about 5 minutes and add liquids/flour if too wet or too dry. 6. If the bread dough is over-rising at the top of the bake pan, either: a. simply scoop some dough carefully off the top, put the extra dough in a greased baking vessel of suitable size. Let dough rise a bit in the oven with the pilot light on, take dough out, preheat the oven at 350F-375F, spray some water in the oven to encourage crust formation, and then bake until the top is golden brown (internal temp. of about 180F to 200F); bake the other portion in the bread machine as usual; -OR- b. remove dough from the machine completely-- separate the dough into two greased baking vessels of suitable size. Let dough rise a bit in the oven with the pilot light on, take dough out, preheat the oven at 350F-375F, spray some water in the oven to encourage crust formation, and then bake until the top is golden brown (internal temp. of about 180F to 200F). 7. Store bread in the freezer for fresh-tasting bread any time: divide the bread into serving portions, place in Ziplock bag(s), suck out/remove the air (but don't crush the bread), and store in the freezer; defrost (in the bag) in room temperature (or wrap the bread in a moist paper towel and microwave for a few seconds) before devouring. Make life even easier--bake extra loaves and freeze them. Conclusion: If you like the taste of "just-baked" breads, but don't like the messy cleanups and the typical baking-related efforts => well, this one is worth the try, and it is worth the price. Just remember to get a bread machine recipe book and enjoy all the possibilities. Great machine! Additional info (8/5/12): I now own two of this -- this review was for the first one, purchased from Amazon, for $40 at that time; the second one might have been purchased from Walmart a few months later for a few dollars more.
D**S
Excellent starter machine for a first time bread baker. Easy to use, easy to clean & good bread. See photos
This is my first ever bread machine and let me preface that by saying I do not like to bake as a rule. What I do like is bread of any type as a snack and with meals - bread is simply my favorite food - I'll choose it over sweets every time. I have recently been diagnosed with a severe adult onset allergy to both soy and eggs, so this has put a dent in eating anything made commercially or at the local bakeries - no more store bought bread, rolls, etc for me. In desperation I decided to learn to make my own and figured I would buy the least complicated, least expensive bread machine on the market with the best reputation - I got this one from the Amazon warehouse. My theory was if I hate doing this then I'm not out a huge amount of cash in the overall experiment. Well, it's been almost three weeks and I've made 12 different loaves so far with great success and almost no trouble at all. This machine is extremely easy to use and relatively uncomplicated. The book is pretty simple and straight forward to understand - though the recipes in it aren't to my liking personally, that's just an individual taste issue. The buttons are large and easy to operate & the LCD screen is clear once you read the book and know what each code means. It is a bit hard to see without good light though. My unit came with a plastic cup for flour and a one piece combo teaspoon/tablespoon for salt & sugar. I am using King Arthur Bread Flour only and Fleishmann's bread machine yeast in the jar (I know there are other yeasts out there, but as a newbie, I went with what 3 of my experienced bread baking friends suggested) and I have absolutely no problems at all with any of my breads rising or correctly or having the right texture when cooked. I have also followed the tip of lightly wiping the paddle with a bit of oil before use so that it slips out of my finished loaf easily. The machine does beep after the first rise before it kneads a second time so you can drop your add-ins in before the second mix/knead session. I've done a loaf of bacon-beer-cheese bread, adding the bacon & shredded cheese in this way and everything incorporated into the dough perfectly. (I felt like a magician putting homemade bacon bread on the table and watching my husband's eyes bug out!) I am still learning something every time I use this machine, but it has earned a permanent place on my counter top and for now anyway, I cannot see any reason to spend more money and buy a two hundred dollar version. I can put the ingredients in an have hot, fresh, soft bread ready in three hours or a slightly denser loaf in an hour on the the quick bake setting. Now that I've got the basics down pat it only takes about 10 minutes to pull the ingredients out, put them in the machine, turn it on and clean up. Done. This is actually one of my favorite purchases of the past year. ******One Year Update Feb 2017 ***** I've been making bread on average twice a week with this little machine for a year. It just works right every time with no drama. I have only had one loaf fail to rise correctly and it turned out that I had used 1/2 the yeast needed....so my fault. I've made cranberry bread, pumpkin bread, peanut butter bread and your usual cheese or nut breads without any issues. The best though is buttermilk bread - it always ends up with a creamy, soft texture that is a big hit as a hostess gift. I would absolutely buy this bread machine again.
K**G
I love this little machine! *Updated
This is my first bread machine and I am a bit disappointed. Just received it yesterday and there are 2 cracks in the plastic that surround the inside and the metal inner lining is crimped in places and warped.(uploaded 4 pictures to gallery) The metal liner edge could be just how it is attached, but I know the cracks in the plastic should not be there. Not sure if I just got a bad one or if this has been reconditioned and resold as a new item. I wanted to return it for a replacement or get my money back through amazon but I don't want to pay return shipping or take the chance on receiving another bad item. I called Sunbeam directly instead and they were very pleasant, and the person I spoke with told me this falls under the 1 yr warranty and they would be shipping out a new product and I would not have to pay to ship the bad unit back. I can't comment on how this bakes yet, but going by the other reviews I am looking forward to baking! *************** Edited to update review ********************** Received new breadmaker from Sunbeam (not Amazon). Not only do they stand behind their warranty but I received free shipping AND they told me to throw away the old machine after making sure I keep the paddle, pan and the rest of the accessories as back up extras.....wow!! I finally got the chance to try this machine out too. I have never used a bread machine before. This was actually fun! Toss in this and that, push a couple of buttons and it does everything for you. I found a bunch of bread machine recipes online (just google breadmachine recipes) so it will be a very long time before I run out of things to try. This was a good buy! :) ******************3 years later************************* This machine is STILL going strong!!! In the over 3 years owning it, it has not left my counter! I use it all the time. We've saved the most money making our own pizza's and focaccia bread. Just mix up the dough and pop into your oven with your choices of sauces and toppings. Bread comes out great, as do rolls. Tons of online recipe's you can use and bread machine books you can buy. This little machine has become a part of the kitchen, I would miss it if it was gone and would for sure buy another. :) *Updated 9/11/14: Almost 4 years now and this little breadmaker is still working like it was brand new! I couldn't be happier with my purchase. Worth every penny! *Update 8/28/15- Still using this little machine, I would buy another one in a heartbeat! * Update 5/14/16 - Still works like new! The only thing that has happened, after years of very reliable use, is the menu list above the LED screen has started to fade away. When I wipe the outside of the machine down after use I now use a lighter touch going over the control panel area. This was well worth the purchase, I never expected that this would last as long as it has. :) ***Update 2/25/17- And here I am again, I've never written this many updates on a review, but I am still very pleased with this little machine. It's looking it's age, but like the energizer bunny it just keeps going, and going, and going,.... I really didn't think it would last this long. I figured I would 'learn' how to do the bread thing and move on to a more professional machine when this machine finally failed, but it has handled everything I've thrown its way and works beautifully! I love it! :) :)
O**A
Sunbeam breakmaker
For 40 dollars it's not a bad machine. I haven't had another one before, so I have nothing to compare it with. The bread is fine, although I am not particularly impressed with the way it looks when the machine actually bakes it. For some reason after the dough raises,when the baking begins, it deflates, so the bread ends up being a little concave. No way does it look like the picture they have on the box witht he bread pushing the lid open! So far I have used the dough setting and I bake it in the oven, either on my pizza stone or in a regular round pan. I am quite happy with the results when I do that. If I let it raise outside the machine for another half an hour or so and then bake it, the bread turns out quite good. I have yet to try the other settings, but since I don't have a lot of time to experiment, for the time being I am sticking to what I discovered that works. The recipes in the book have too much yeast. I keep experimenting with recipes found online and keep reducing the amount of yeast. If I find a perfect recipe I'll add it here. All in all, the machine saves time and effort. If you use the dough setting ad then bake the bread in the oven you'll be happy. OK, I am back after three months of continuous use. The machine is great, but the problem remains the same. Since I bought it I've been baking perfect loaves of French bread - perfect crust, perfect texture, perfect taste. the trick is that I bake them in the oven. When I try to bake them in the machine, they don't raise or the texture is way too coarse. I don't mind baking them in the oven, though. The square bread never turned me on, and I like experimenting with shapes. It's unbelievably easy to make bread and by now I don't even bother about really weighing everything or measuring the temeprature, etc. So don't worry about that, just put the ingredients in there, let it raise for 20 minutes outside the machine once the dough cycle is completed, shape it the way you want to, and bake the bread in the oven (I do it on a pizza stove and the results are amazing each time). The recipe that works best for me: 3 cups of white flour, 1 cup of whole wheat 1 cup and 3/4 of water 1 tablespoon of olive oil 1 teaspoon of salt 2 teaspoons of sugar 1 1/2 teaspoons of yeast. TRY IT. you'll love it
J**E
Simple yet totally awesome
I've never owned a bread machine before, so my review might be biased in that way, but I'm absolutely in love with this bread machine. It's so simple to operate, is very quiet, and makes bread making a lot more fun than it used to be. I've even decided to stop buying store bought bread altogether and we're eating only homemade bread! I do have some issues, but they're really not that big of a deal. The first problem I have with this machine is that the paddle often gets stuck after the bread is baked. However, I've found that if you soak the bucket in hot water for about 5 minutes and then wiggle the paddle back and forth, it'll come loose. If that doesn't work, slide a dish cloth under the paddle and lift upward. I also have the issue that my white bread has the tendency to deflate when rising for the last time, and has a funny bowl shape on top. It doesn't affect the bread in any other way, but it's kind of ugly looking. It's never happened to my whole wheat bread, though, and since I mostly make whole wheat, the issue isn't really worth looking into. It's probably that I'm adding too much water. The manual is very uninformative, as well, and doesn't give a newbie like me much info to help me figure the machine out. But I suppose I should stop being cheap and just buy a bread machine book. One more thing. The bread is kind of a funny shape. It's very tall and wide. I compensate by whacking an inch off the bottom of my 1.5 pound loaves, which gives me the shape of bread I'm used to getting from the store. This also solves the problem of having a paddle indent in the middle of the bread. Other than that, I'm totally in love with my new bread machine. I'm probably going to keep using it until it falls apart! UPDATE 9/2/2019: Well, here we are, almost ten years later. This machine has seen me through so much of my life! We went through a period of not baking a lot of bread, but for the last year or so we have picked back up. I'm currently making about two loaves of bread plus one batch of pizza dough a week, and it's holding up fine! I did have to recently take the machine apart and oil some internal parts because the blade was starting to lose power. But now it's working like a champ again! I also had to replace the bread pan early on in my relationship with this machine. It turns out you should never immerse the pan because it rusts out easily. The second pan only gets a short soak with hot water inside the pan only, then dried right away. It's still going strong and I suspect it will last me at least another couple of years.
O**O
Bien
Lo que esperaba.
M**B
Llegó bien y funciona.
Llegó en el tiempo estimado. He de admitir que estaba un poco preocupada por el producto al ver la caja, ya que la noté muy maltratada, sin embargo, el aparato llegó intacto con excepción del manual de uso que llegó roto (la portada totalmente desprendida y rasgada). Me apresuré a estrenarla para asegurarme de que no hubieran problemas en el funcionamiento de la planificadora.
Trustpilot
2 weeks ago
2 months ago